Once your order is placed and payment is confirmed, the server deployment process will begin immediately. After it’s complete, you’ll receive an activation email containing all the necessary details to access your server.
We suggest two ways to connect from your Windows computer: using the built-in Remote Desktop Connection app or downloading the free Microsoft Remote Desktop app from the Microsoft Store.
Method 1 – Remote Desktop Connection
Step 1:
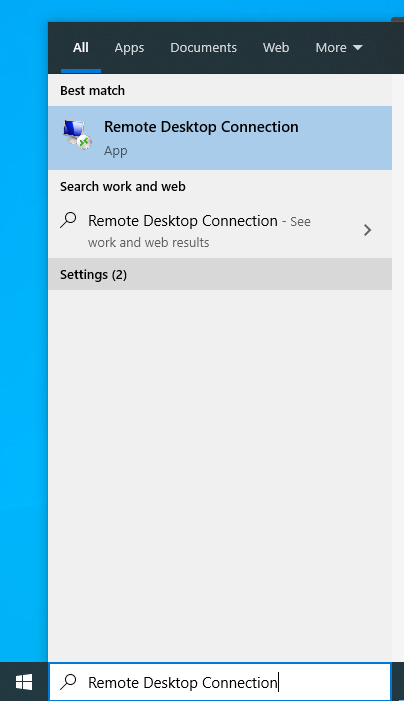
Search for the built-in Windows program Remote Desktop Connection and launch it.
STEP 2:
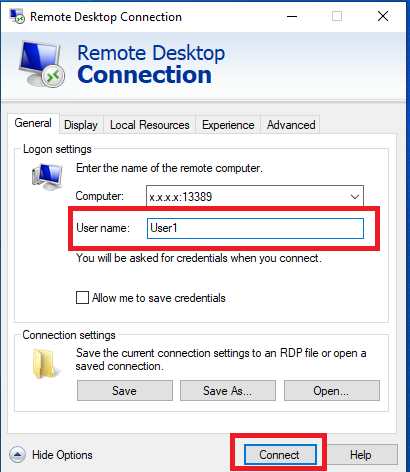
In the Computer field, enter the IP address of your new server from the activation email in the format: x.x.x.x:13389, where x is your server’s IP address. Be sure to include the port number after the IP.
STEP 3:
Enter login credentials when prompted.
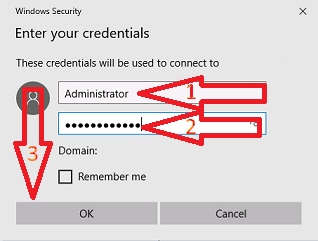
Please note: Be cautious when copying your username or password, as spaces can accidentally be included. Ensure that you carefully select and copy your credentials from the activation email, avoiding any extra spaces.
STEP 4:
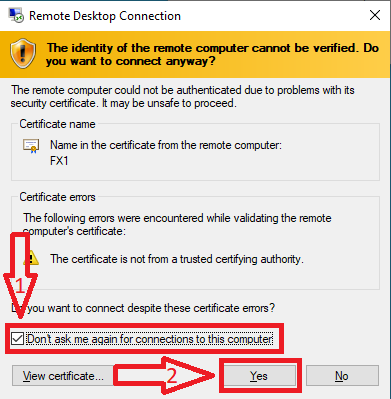
Tick the box Don’t ask me again for connections to this computer and press Yes.
STEP 5:
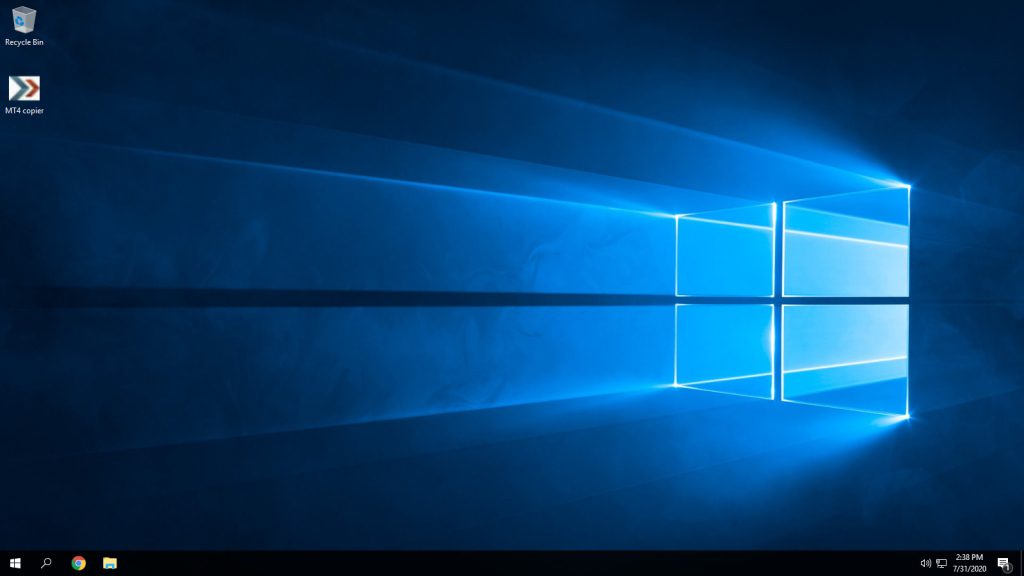
If everything is done correctly, you should see your servers desktop.
Method 2 – Microsoft Remote Desktop
STEP 1:
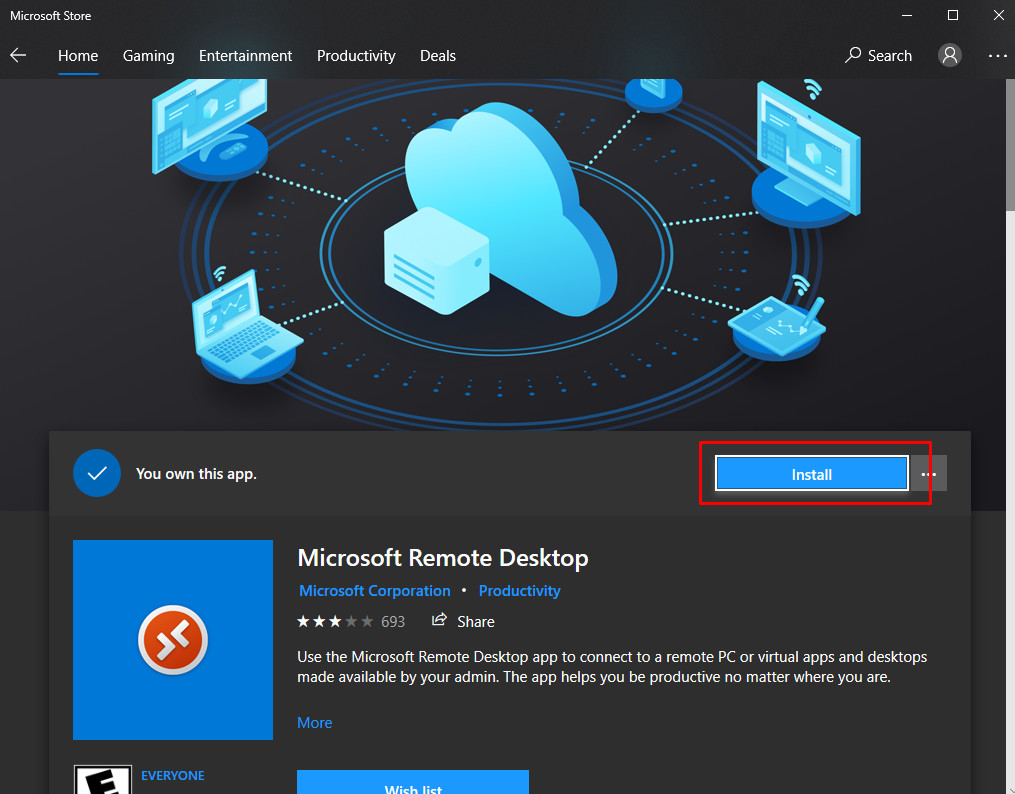
On your Windows computer, open the Microsoft Store and install the Microsoft Remote Desktop application provided by Microsoft.
STEP 2:
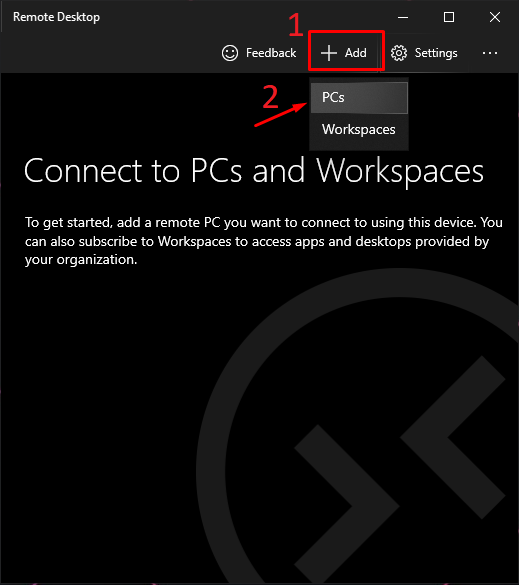
After installation is completed, open the application. Click + Add button at the top and select PCs
STEP 3:
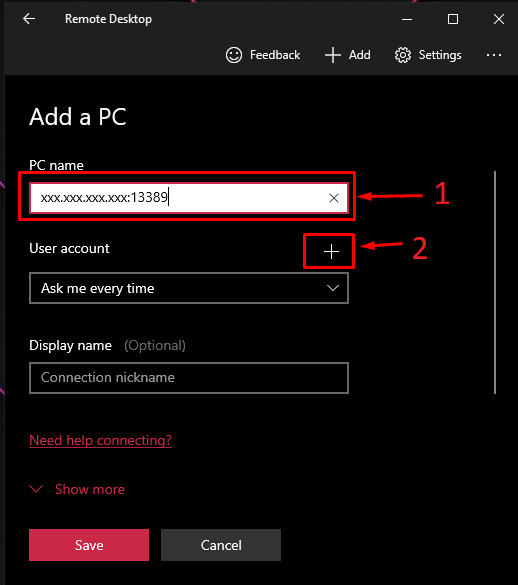
In the PC name field, enter the IP address of your new server in the following format: x.x.x.x:13389, where x is your server’s IP address. Be sure to include the port number after the IP.
Click the + icon in the User account section to save your connection details.
STEP 4:
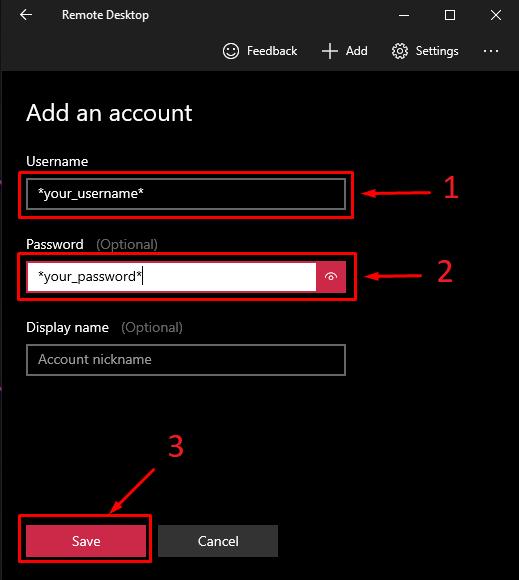
Enter the Username and Password of your new server, then click Save.
Be sure to carefully copy your credentials from the email to avoid accidentally including any spaces at the beginning or end!
STEP 5:
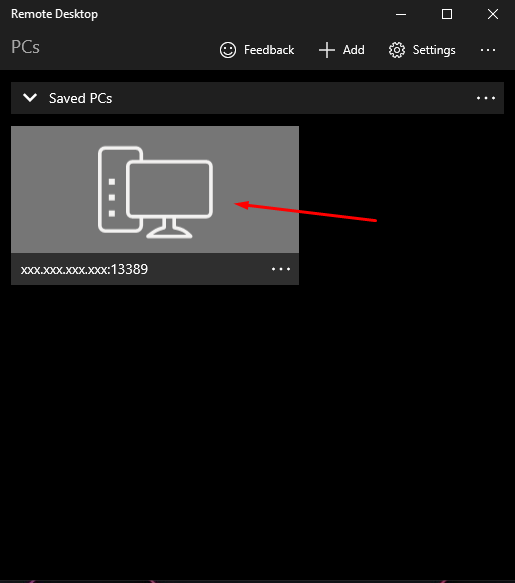
Click Save again to add your new server to the list of saved connections. Then, click on the newly added remote PC to establish a connection.
STEP 6:
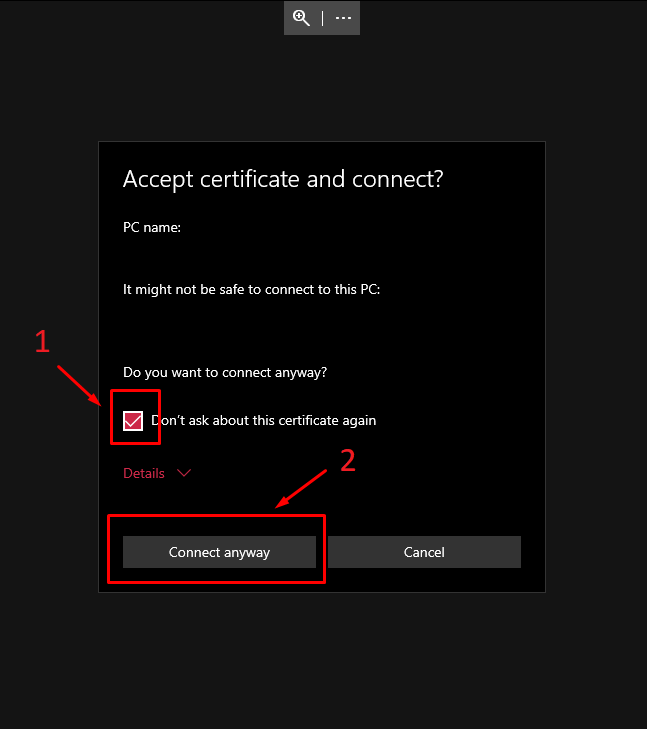
Check the box labeled Don’t ask about this certificate again and click Connect anyway. If everything is set up correctly, you will see the desktop of your VPS.
